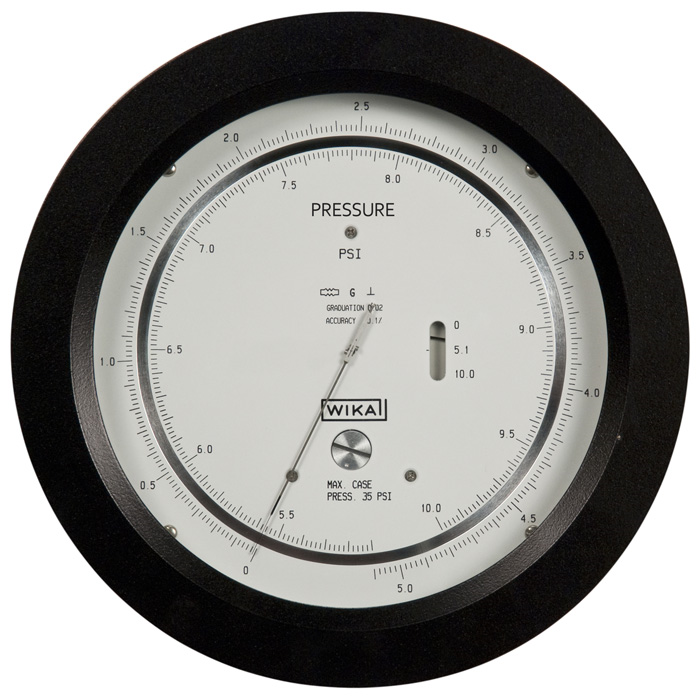
Description
Applications for a precision gauge:
- Test, laboratory, and production applications
Special features of a precision gauge:
- These gauges have capsules up to and including the 150 psig range and Bourdon tubes in the higher ranges
- Pressure is applied to the capsule or Bourdon tube through a single case connection
- Readings are referenced to atmospheric pressure in the case
- Available in 26 standard ranges, (including vacuum and compound ranges) These gauges combine aneroid convenience with precision-liquid-column accuracy
Standard features of precision gauges:
Precision gauge case construction
The precision gauge cases on WIKA model 1000-6I are constructed of aluminum with tempered glass windows. The bezel has no screw holes, and the case has special clips for easy flush mounting.
Materials exposed to measured gas
The capsule type precision gauges are suited for applicaitons of 50 psi and below. Options include Ni-Span C®, brass, stainless steel, soft solder and sliver solder. On precision guages in ranges up to and including 150 psi, 303 stainless tubing and adapters with silver solder at the pressure connection is an option — instead of brass and soft solder. With precision gauges in the range of 200 psi or more, 303 stainless tubing and adapters with silver solder is standard.
In Bourdon tube precision gauges, suited for ranges 200 psi and above, material options are Ni-Span C, stainless steel, Easy-flow #45 brazing alloy, sliver solder, nylon or TFE.
Ranges
-30″Hg to 1,000 psig
Accuracy
0.1% to full scale
Repeatability
0.03% of full scale
Sensitivity
0.01% of full scale
Hysteresis
0.1% of full scale for ranges of 150 psi and below
0.2% of full scale for 200 psi and above
Maximum temperature effect
0.1% of full scale per 10◦C/18◦F C change from reference temperature 23◦C/73.4◦F
Scale length
30″ through two pointer revolutions
Dial diameter
6″
Pressure element volume
Ranges 150 psi and below:6.9 cc with pointer at zero; 8.6 cc, at full scale
Ranges 200 psi and above: 10 cc. For the range 1-125″ water only: 6.3 cc with pointer at zero; 8.0 cc, at full scale
Case connections
150 psi and below, 1/8″ female NPT; 200 psi and above, 1/4″ female NPT. Both have a built-in stainless steel filter and are located in the bottom of the case.
Zero adjustment
A zero adjustment is accessible through the front of the case.
Weight and shipping weight
Approx. 8 lbs.
Ordering information
When ordering, please specify ordering number, range, and mounting angle. (Extra cost if mounting angle is other than vertical).
Note: Gases must be non-corrosive, no liquid service.
Precision gauge options
-
Calibration is offered in most metric units at no extra cost.
-
Also available installed in a compact carrying case with a mounted panel for the gauge. The cover is easily removed and connections can be made without removing the gauge from the case.
Selected documents


